

The Five Steps for Using a Three-Compartment Sink
Written by Staff Writer
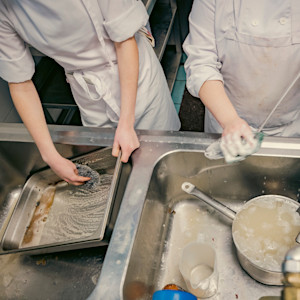
Three-compartment sinks are a familiar sight in most commercial kitchens, but using one correctly takes more than filling each basin and moving dishes down the line. The steps need to happen in the right order because each one prepares dishes and utensils for the next.
That order also comes with a few details that are easy to miss, especially when it comes to water temperature, sanitizer strength and knowing when the sink water needs to be changed. Understanding how each stage works can help you avoid common mistakes and keep your dishwashing process effective.
What Is the Correct Three-Compartment Sink Order?
You might assume that a three-compartment sink requires three steps to properly clean dishes; however, the full process includes five steps:
- Scrape or pre-rinse
- Wash
- Rinse
- Sanitize
- Air-dry
The three compartments themselves are used for washing, rinsing and sanitizing. Scraping happens before dishes enter the sink, while air-drying happens after they come out. You may also hear this process called the three-sink method or manual warewashing. Whatever term is used, the steps are the same.
How to Use a Three-Compartment Sink
Proper cleaning means completing each of the required steps in order. Here’s what each involves.
Step 1: Scrape or Pre-Rinse Food Debris
Before dishes reach the first compartment, you first need to remove leftover food and other visible debris.
Scrape food into the appropriate waste container. If residue is dried on or difficult to remove, you may also need to soak or scrub the item before moving on to the next step.
At this stage, you don’t need to get the dish completely clean. All you are trying to do is remove enough visible debris so the soap in the next step can do its job.
Step 2: Wash in the First Compartment
The first compartment you will use is the wash sink.
Reference your facility’s cleaning procedures to fill it with the correct amount and temperature of water, then submerge and wash dishes, utensils and equipment with the appropriate detergent. Scrub each surface thoroughly enough to remove grease and any food residue.
You should also follow the detergent manufacturer's instructions and any local food code requirements that apply to your operation.
The sink also needs to be large enough for what needs to be washed. The U.S. Food and Drug Administration (FDA) Food Code states warewashing sink compartments should be large enough to accommodate the largest equipment and utensils used in the facility. If an item is too large to be cleaned properly in the sink, the establishment must use a warewashing machine or another approved method designed for that equipment.
Local jurisdictions may add more specific requirements. Maricopa County requires each compartment to be large enough to submerge at least 50% of the largest item being washed. If large stockpots, sheet pans or other equipment can’t fit properly, the facility will need to find an alternative approved cleaning method for those pieces.
Step 3: Rinse in the Second Compartment
Once an item is washed, move it into the second compartment for rinsing.
The rinse step removes detergent, loosened food particles and any other residue left behind during washing.
Make sure each item is thoroughly rinsed, and you don’t see any visible soap suds or residue. You should also keep the rinse water clean enough to do its job.
Step 4: Sanitize in the Third Compartment
The third compartment is used for sanitizing dishes and utensils before they are dryed and stored.
Your setup may use a chemical sanitizer or hot water. Each method comes with its own requirements, so be sure to follow the correct procedure for the system your establishment uses.
If you use a chemical sanitizer, follow the product label for the proper concentration, temperature and contact time. Use the appropriate test strips or other testing device to make sure the solution stays within the required range.
Never rely on appearance or smell alone to judge sanitizer strength. A solution can look completely normal while being too weak to sanitize properly. Sanitizers that are too strong are also an issue, as they can cause skin, eye or respiratory irritation and leave a chemical film on the clean dishes that can contaminate food.
Hot-water sanitizing works differently and has its own temperature and immersion requirements. Regardless of which method you use, you need to leave the dishes submerged long enough for the process to work.
Step 5: Let Dishes Air-Dry
After sanitizing, place dishes and utensils on a clean drainboard or drying area and let them air-dry completely.
Do not dry them with a towel.
This is because even a towel that looks clean can transfer microorganisms back onto a freshly sanitized surface. Towel-drying also adds extra handling at the point when dishes should be left alone.
Air-drying isn’t an optional finishing step. You need to wait until items are fully dry before stacking or putting them back into service.
Temperature and Sanitizer Requirements
Correct washing and sanitizing procedures often rely on following certain temperature requirements. While the correct number isn’t universal, the FDA Food Code has set minimum temperatures for washing and sanitizing.
The wash compartment needs to be maintained at least 110 degrees Fahrenheit or at the temperature requirements for your cleaning method, product and local code.
If you use hot water immersion for sanitizing, you must keep the temperature at 171 degrees Fahrenheit or higher and let the items soak for at least 30 seconds.
Sanitizer concentration and contact time requirements can also vary, and you should always follow the EPA-registered label use instructions. The Food Code provides the following minimum requirements for chlorine, iodine, and quaternary ammonium compound solutions.
- Chlorine: Requirements depend on concentration and pH. For instance, a solution at 50 to 99 mg/L must be at least 100 degrees Fahrenheit at a pH of 10 or lower, or at least 75 degrees Fahrenheit at a pH of 8 or lower. At 100 mg/L, lower temperatures may be allowed.
- Iodine: The solution must generally be at least 68 degrees Fahrenheit, contain 12.5 to 25 mg/L, and have a pH of 5.0 or lower unless the manufacturer specifies otherwise.
- Quaternary ammonium compounds: The solution must generally be at least 75 degrees Fahrenheit and used at the concentration listed on the product label. Water hardness limits also apply.
Don’t guess when it comes to concentration and temperature. Use the product’s label and the food code your facility follows as your guide.
How Often Should You Change the Water?
It won’t matter if you follow the steps in the correct order if you are washing or rinsing dishes in dirty water.
Since every facility is different, there isn’t a set standard around when you should replace the wash water. A lightly used sink may stay usable much longer than one handling a large stack of greasy cookware during a dinner rush.
You should use your judgement and replace it when the water is visibly dirty or you can’t see the soap suds anymore. Likewise, you should replace the rinse water when it looks cloudy, greasy, or has food particles in it.
The sanitizer compartment needs closer monitoring because the solution needs to stay within its required concentration range.
Throughout the shift, be sure to test the sanitizer concentration based on the product label or your facility guidelines. If the sanitizer becomes diluted, contaminated or falls outside the concentration listed, replace or adjust the solution.
If the method you use depends on maintaining a particular temperature, make sure to monitor it rather than assuming the water remains hot enough over time.
Preventing Cross-Contamination Around the Sink
A three-compartment sink can only do its job if clean items stay separate from dirty ones. That makes the setup around the sink almost as important as what happens inside each compartment.
Start by keeping soiled dishes on the dirty side of the washing area and moving them in one direction through the process. Once an item has been sanitized, it should go directly to a clean drainboard or drying rack.
Once dishes are clean, they need to be handled with care. Touching food-contact surfaces with dirty hands after sanitizing can transfer microorganisms back onto them, undoing all the work that was just done. Do your best to handle utensils by their handles and dishes by areas that don’t come into contact with food. Likewise, you should avoid placing sanitized dishes on dirty or unsanitary surfaces.
The sink itself should also be regularly cleaned. Grease and debris can quickly collect in areas like faucets, drainboards and basin edges during a busy shift. Wipe down these areas regularly to avoid contaminating freshly washed items.
Common Mistakes
Mistakes are usually a result of rushing through the process or treating one step as a substitute for another.
Every step has a purpose, so skipping one can keep the next from being effective. If you put heavily soiled dishes straight into the wash compartment, the water can become dirty much quicker. If you move dishes directly from washing to sanitizing without rinsing, you can leave a film of detergent once they dry.
A three-compartment sink should never double as a handwashing sink. Employees should wash their hands only in a designated handwashing sink.
Depending on local food code requirements, a warewashing sink may be used for other reasons beyond washing dishes. Washington State, for example, allows a warewashing sink to be used for washing produce, thawing food, or washing wiping cloths, as long as required cleaning and sanitizing procedures are followed. On the other hand, jurisdictions such as Los Angeles County require a separate food-prep sink for washing, rinsing, soaking, or thawing food.
Keep the Process Consistent
Using a three-compartment sink correctly comes down to more than remembering which basin comes first. Water quality, sanitizer strength, contact time and drying all effect whether the process works as intended.
When you understand what each stage is supposed to accomplish, it becomes easier to spot shortcuts or mistakes before they turn into bad habits.
To further your food safety knowledge, StateFoodSafety offers Food Handler and Food Manager training that can help you build a stronger understanding of cleaning, sanitizing and other food safety practices used throughout a commercial kitchen.